X
It can be hard to stand out in the eCommerce industry. Sometimes it feels like there are so many competitors within your niche that there’s nothing you can do to improve your standing. However, there are actually some simple techniques you can use to make your shop more appealing to potential customers. One of these is upgrading your product photos.
Product photos are one of the main factors that buyers use when deciding which shop to choose, and which product to buy. In fact, according to a survey conducted by Insider Intelligence, 83% of respondents reported that product images are influential in their purchasing decisions. Since consumers can’t see and feel the product in person, they rely on the product images to help them choose. Therefore, making sure your photos are top notch will help you to close more sales.
Upgrading your product images might sound intimidating. Paying a professional to take your photos can be expensive, and you don’t always wind up with the results you want. You don’t need to partner with a professional photographer to make your pics look prettier, though. There are a number of easy strategies you can use to make your DIY product photos look trustworthy and beautiful.
Here are our top 10 tips for improving your eCommerce product photography.
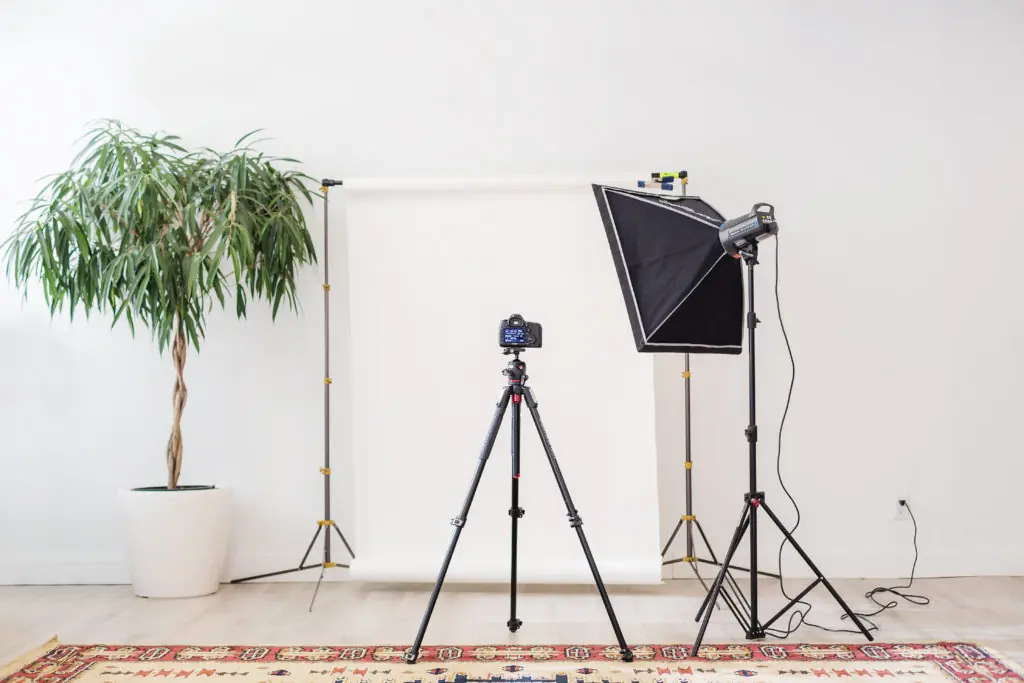
Before you start snapping pictures, make sure that you have the right equipment for the job. There are just a few supplies you need in order to take clear, crisp photos.
The first thing that you need is, of course, a camera. While a good quality camera can be helpful, modern day smartphones have made taking photos easier than ever. If you don’t have the budget to invest in a camera, you can still take great, high-quality DIY product photos with your iPhone.
Some eCommerce sellers choose to upgrade to a camera so their photos really stand out. There are countless articles on the internet written about how to choose a camera that works for you. If you aren’t a photo wiz, however, we recommend sticking with something classic and simple. For many eCommerce sellers, a point-and-shoot camera is the way to go because you won’t need to mess around with complicated settings. Simply aim it, and click the button. Don’t be afraid to shop for a used camera, either. It can save you lots of money.
Once you have a camera, you’ll want to get a tripod. A tripod is a key investment if you want to take better photos because it helps keep your camera steady, reducing blur and making it easier to get a sharp, consistent shot. Choosing a tripod doesn’t have to be complicated. Make sure it is steady enough to suit your needs and fits your camera well.
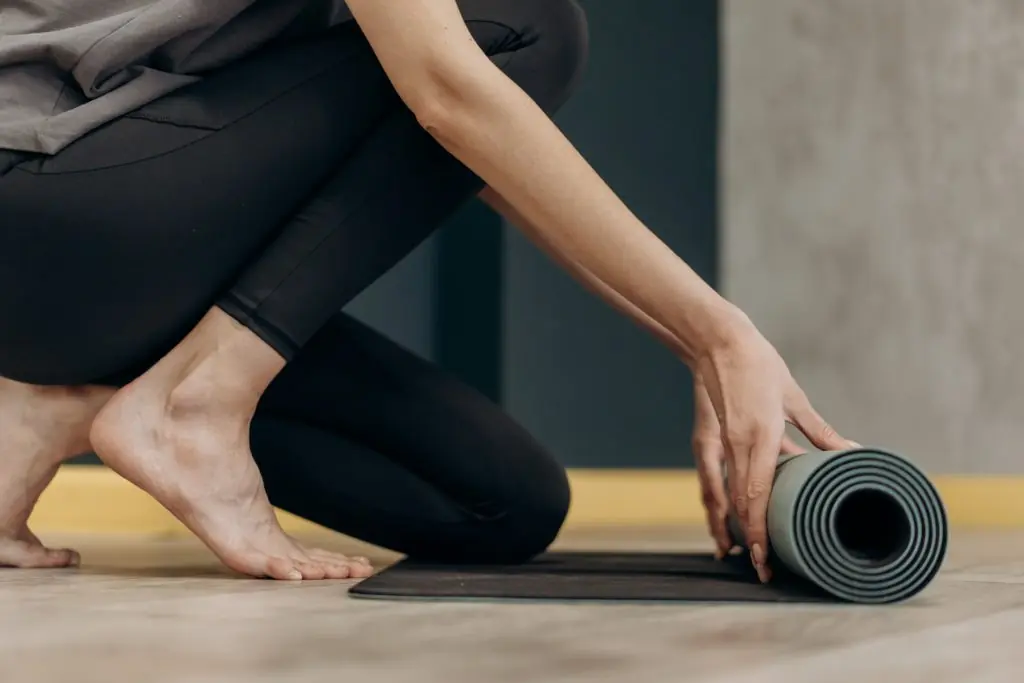
You’re going to need a surface on which to photograph your product. A plain table is an easy solution. You can cover the table with a white or colored tablecloth or a piece of poster board in order to make it look more uniform. If your product is too large to put on a table, you can place it on the floor instead.
Next, it’s time to figure out what you’ll use for your background. When it comes to setting up your background, don’t go overboard. If you’re looking for a white background, a large piece of white poster board will do the trick. You can also use a plain white wall or hang up a white sheet.
It’s also a good idea to get bounce cards or reflectors so that you can manipulate the light to your advantage. These are pieces of cardboard or fabric that are typically colored white or silver, and can be used to bounce light at a subject. You simply set them up at an angle that reflects light on your subjects. Bounce cards can be readily found on Amazon, or you can make one yourself out of white poster board.
Finally, decide how best to complete your lighting setup. You want your product to be well lit so that potential customers can see it clearly in the images. If you are planning to take your DIY product photos in a room with windows, it’s a great idea to use natural light to your advantage. You can also use lamps and lights you already have. Investing in some professional lighting equipment can elevate your photos, too.

Taking a good photo requires you to set the scene correctly. You want your product to look its very best in the photographs. That requires a little bit of work to make sure it’s well lit and positioned in a flattering way. It’s not difficult, but it might be a little unintuitive for those who have never done it before.
First, pick a room that is easily available to you. It’s best if it has a window with natural light and plenty of space to move around. Then, set up your table near the window so it’s well lit. Place your white background on the table with space in front of it. The item you are photographing goes in front of the white background.
At this point, it’s important to spend some time arranging the product so that it is perfectly positioned. Go ahead and try out several different positions to find the one that is most flattering for your product.
If you’re using a lighting setup, arrange your lighting so it brightens your product and makes it stand out from the background. The key is to have your product catch the light in a way that illuminates all of the details without creating shadows that darken aspects that customers will want to clearly see. If you’re having trouble getting the product properly lit, use bounce cards to play around with how the light hits it.
When your products are either very big or very small, it can be a bit more difficult. For a particularly small item, consider gluing it onto the white background so that you can photograph it head on. For a big product, on the other hand, you can place it on the floor and arrange your lighting and camera accordingly.
If there’s one thing you need to get right when taking a picture, it’s making sure that the image is sharp and in focus. For those with no camera experience, however, this is easier said than done. While photo editing software can indeed up the sharpness of a photo, it’s much better to make sure that the original image is as clear as possible.
Using a tripod helps keep the camera still while you’re taking photos. This improves the sharpness of your images. Making sure your product is well lit is another way to ensure a clear picture, so if you’re having trouble with clarity try increasing your light.
When using a camera, there are a few additional ways to make sure that the image is sharp. Before taking a photo, press down the shutter button halfway while aiming at your product. This will cause the camera to readjust its focus, bringing your item into focus. Of course, you can also fiddle around with settings or manual focus if you’re still not getting the results you want.
Another tip for taking sharp photos is to experiment with your shots. If you find that the first photo you take is blurry, try changing the angle or lighting. Taking multiple photos will also help you pick out which ones are clearest before actually doing any editing.
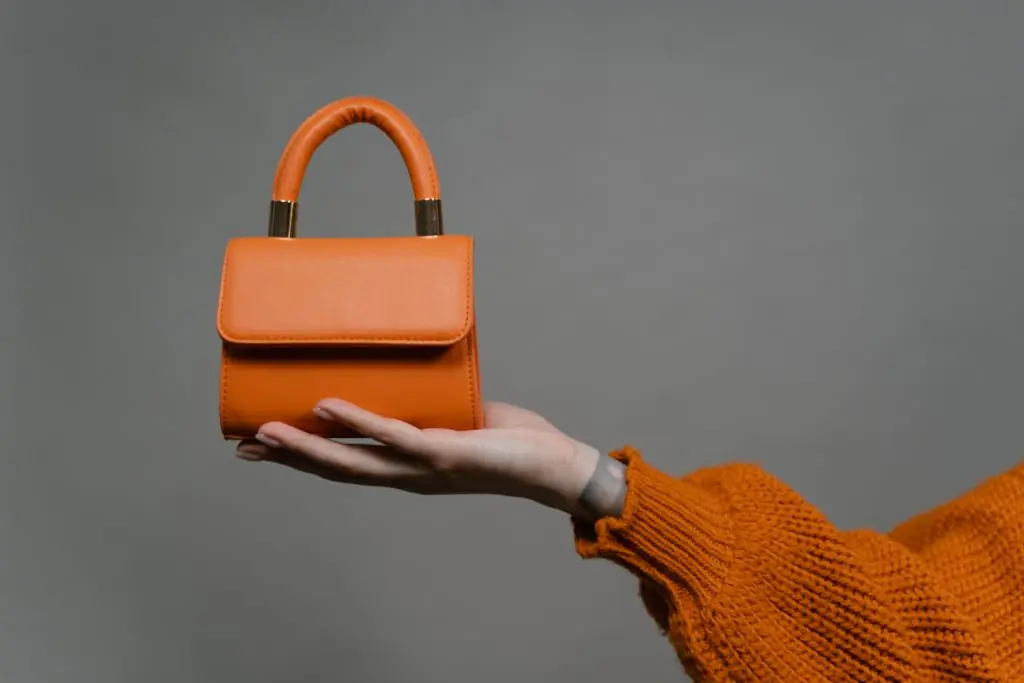
If you want to give your buyers a good idea of how big your products are, you can consider showing scale within the context of the product photo. This is a helpful way to give potential customers a better idea of the size of your item. For certain products, like a handbag or tube of lotion, it’s important that customers understand the scale. There are a few different ways of doing this.
The first is to place your product alongside other familiar objects when taking the photo. Household items work best for this, as they will give your customers a sense of how your product would look in their home. Anything lying around your house will do, but try to stick to generic and plain items that have a standard size. For example, you might photograph your product next to a pencil or a banana. The last thing you want is for your product to be overshadowed by another branded item.
Another option is to photograph someone holding your product, or include a hand in your image. This gives the potential customer the ability to understand its size in relation to a person or a human hand.
If those methods don’t work for you and your product, you can also go the route that many eCommerce photographers choose: adding in an item for scale while editing. This can be a silhouette of a person with an attached measurement, a simplified ruler, or a model with an average height. For smaller items, try using a coin or even include a hand in the frame.
If you decide to do this, make sure that your final photograph looks professional and the object you include for scale is understandable. There are many instances of this method being used only to ruin the visual appeal of the original photograph.

This might seem like an obvious note, but it’s something that many store owners neglect to do. In order to properly present your product, it’s important to photograph every angle of the product that you are selling. One photo isn’t enough.
Think about it. When you walk into a brick-and-mortar store, you’re likely to pick up a product and look at it from all sides before actually purchasing it. That’s because you want to have a thorough understanding of what you are buying. Taking photos of a few extra angles of your products will give potential buyers a better idea of what it is you are selling.
While this process may be slightly tedious, the nice thing about it is that it doesn’t require you to redo your entire setup. All you really need to do is rotate the item and snap another photo. You should be aware that each side of the product may need slightly different lighting, though, so be ready to make small adjustments if it seems necessary. You should also be very mindful that each photo you take includes the entire product. If each side has different proportions, adjust your zoom (or where you’re standing) so that all of the details are visible.

Many eCommerce shops sell slight variants of each of their products. Clothing shops, for instance, will have different sizes and colors for many of their pieces of apparel. To give your customers a good understanding of what each variation looks like, it’s a smart idea to photograph each variation that you have. That way, customers will be able to find a picture of any item they are considering purchasing.
Of course, you can go overboard with this. If you have four sizes and four colors, that’s sixteen variations. Realistically, you don’t need to take a photo of each. Use your best judgment here and try to think about what the customer would actually need to see to understand what they’re buying. Most customers can imagine what the different sizes of a shirt would look like, for instance, so you probably don’t need a photo of all of those.
When it comes to color, on the other hand, it’s a good idea to include a photo of each, since it’s hard to visualize a specific color from just the name. If you’re particularly tech savvy, however, you don’t need to take a photo for each color variation of the products that you’re selling. Photo editing software can be used to make accurate mock-ups of what different colors of products look like. Many large clothing brands do this so that each picture looks the same aside from the shade of the garment.
Sometimes it makes sense to take a picture of your item in front of a white background. Other times, though, that’s not the best way to sell something. Some products are more suited toward action shots. If that’s the case for what you’re selling, don’t be afraid to abandon the white background formula.
Think about camping gear, for instance. While a photo of a tent or backpack in front of a white background might be totally fine, camping fanatics are probably much more likely to want to buy gear if they can see it actually being used on an adventure. The same is often true for sports gear. If consumers see an athlete putting a piece of gear to the test, they’ll be excited to try it out for themselves.
Action photos definitely take more time to set up, but they can be quite rewarding. You’ll need to think through some logistics, though. Do you need to hire models? Will the photos be shot inside or outside? How will you get your product to the photoshoot destination? Make a plan by answering questions like these and then go for it.
When deciding how to photograph your product, think about how it will look best. Remember, if you’re selling a household item or clothing, for instance, a white background will probably do just fine.
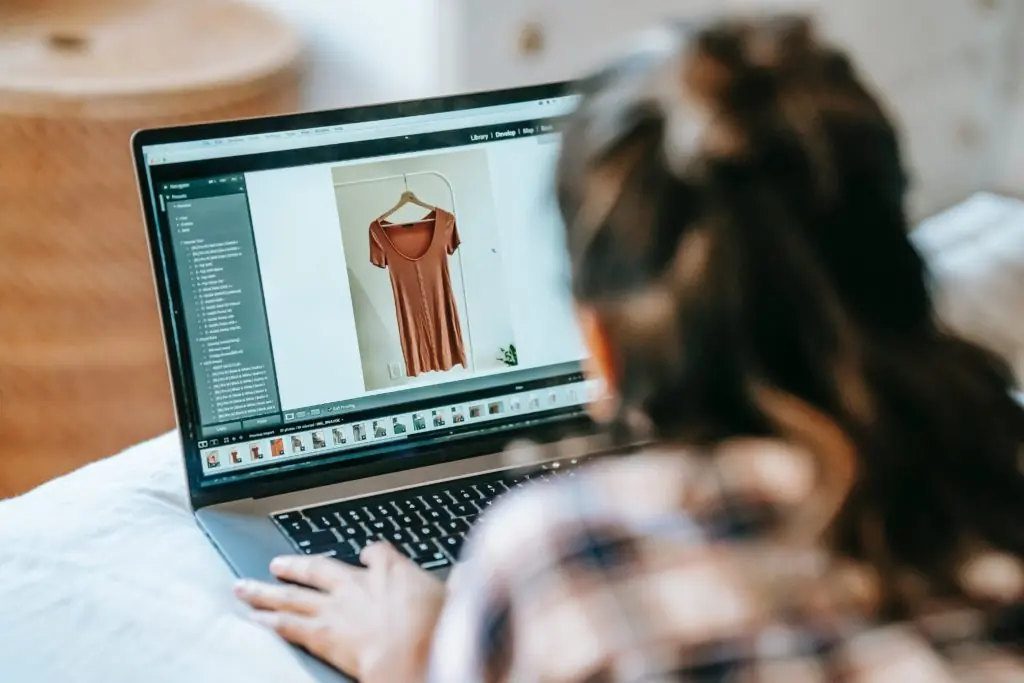
Once you’ve taken all of your photographs, the next step is to import those photos onto your computer so that you can edit them. One of the most important edits that you should make is to remove the white background. If you scroll through products on Amazon, you’ll notice that the vast majority of photos display the product without a background. This is because the background can have distracting inconsistencies. Removing it allows the customer to focus completely on the object they are thinking about buying.
This might sound like a complex process only suited for Photoshop experts, but it’s actually very easy. There are a number of free tools out there that do an excellent job of removing backgrounds with little effort. One such tool is Ssemble’s Background Remover, which enables you to easily and accurately remove the background from an image with just one click.
Other options for background removal include Removal.AI, Cutout.pro, inPixio, and PicMonkey, among others. Many of these tools use artificial intelligence, or AI, to detect the subject and the background, and then they can seamlessly remove the background for you. In addition, the magic eraser tool is your best friend in whatever photo editing software you use. It’s a smart enough tool that it will be able to grab all of the white background once you click on it. Then, it’s as simple as pressing delete.
You’ll then have your product image on top of a transparent background. If you want to put a solid color behind it, you can make a new layer, fill it with a color, and place it underneath the layer containing the object. If you want to keep it transparent, just save it as a .png and the photo will remain transparent when uploaded to your website. At that point, it will take on whatever color the background of your website is.
You can even get creative once you edit out the white background. If you have a fun image that suits your product, feel free to put that in the place of the previous background. Just make sure the image still has a good visual flow.
In addition, you might want to include text or titles on your images to highlight certain features of your product. Canva’s add text to photos feature allows users to easily add captions, quotes, or headlines to their photos. This feature makes it easy to create eye-catching and professional-looking images for social media, marketing materials, and more.
In addition, you might want to include text or titles on your images to highlight certain features of your product. Canva’s add text to photos feature allows users to easily add captions, quotes, or headlines to their photos. This feature makes it easy to create eye-catching and professional-looking images for social media, marketing materials, and more.

Having a consistent visual theme across your entire storefront is incredibly important. It adds an air of sleekness and professionalism that you may not have had before. One way to do this is by making all of your images the same size.
Resizing images in a photo editing app or software is really easy. Most of them have a resize option under the “Edit” bar on the top. Be careful to make sure that both the vertical and horizontal heights resize at the same time, though. If you do one at a time, your proportions can end up getting warped. There are even free photo resizing programs available on the internet that make the process a breeze, but just make sure that the photo resolution isn’t ruined if using one of these.
Of course, this is a bit of a challenge if your products are all different sizes and proportions. If you sell both candles and balls, for instance, you are going to have some photos that are very tall while others are more square-shaped.
A good trick to get around this is to place all of your images onto a square canvas of the same size. This makes it so that all of your images will have the same dimensions despite the products being different sizes. Then, they will all look visually consistent when your site is loaded.

No matter whether you run your own website or use a service like Shopfiy or Amazon, the file size of your image matters. Large image files take a few seconds to load, and that time is crucial in keeping the interest of your customers. Today’s internet users are used to instant gratification, so they are likely to navigate away from your shop if the load times are too long.
To reduce loading times, you need to compress your images. But be careful when doing so. Image compression is a balancing act. Your website will be slow and laggy if you don’t compress them enough, but the images will look grainy and unclear if they are compressed too much.
Compressing your images the perfect amount will take some practice, but most modern editing software has tools to help you do so. Photoshop, for instance, has a “Save for Web” tool that lets you see how much you are sacrificing image quality with different compression. There are also third party image compression programs out there that can do all the hard work for you. If you’re having trouble figuring compression out, trying out software like that can help a lot.
Now that you know how to take beautiful DIY product photos, it’s time to update your eCommerce store! Upgrading your product listings and marketing photos can work wonders when you’re trying to sell more and scale your business.
Do you need funding for your marketing expenses? 8fig offers eCommerce sellers a free suite of innovative planning tools to help you visualize your expenses, including marketing. Then, we provide you with continuous capital at every stage of your supply chain so you can scale to new heights. Sign up for a free Growth Plan today and see how 8fig can fund your growth!

Crack the code to funding your eCommerce business with this step-by-step guide, and learn how to secure the capital you need to grow while staying on top of your strategy.

Stuck with extra inventory after Amazon’s Spring Sale? Learn five smart strategies to clear unsold stock, boost cash flow, and avoid future overstocks with smarter inventory planning.
![BFCM: The ultimate guide to eCommerce sales [2025]](https://www.8fig.co/wp-content/uploads/2023/09/cover-2-768x432.jpg.webp)
Get ready for Black Friday and Cyber Monday with our guide on maximizing sales through smart inventory management, effective marketing strategies, and leveraging eCommerce financing.