X
ECommerce business owners have plenty of options when it comes to choosing a selling platform. BigCommerce and Shopify are two such established eCommerce platforms, each with its own benefits and drawbacks.
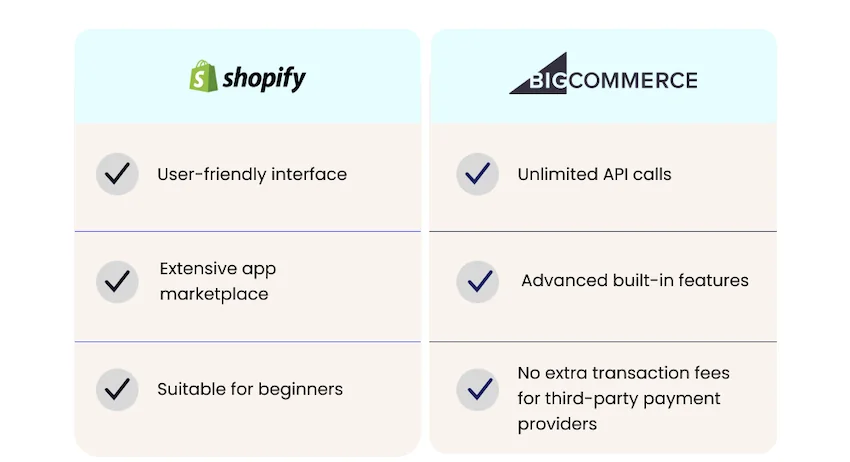
While Shopify’s charm lies in its straightforward design and an abundant application environment, BigCommerce is more extensive, offering unlimited API calls and a broad range of built-in features that enhance its appeal for growing businesses.
Shopify is often a great choice for eCommerce sellers just starting out, but if your brand is growing fast and you’re in search of a new solution, you may want to turn to BigCommerce. Fortunately, migrating your store from Shopify to BigCommerce isn’t too difficult. In this article, we’ll break down the steps you need to take to migrate from Shopify to BigCommerce.
Shopify makes eCommerce simple for beginners with its intuitive interface and a wide array of app integrations, providing flexibility and various options to enhance the functionality of an online store.
BigCommerce, on the other hand, makes its mark as a more robust platform with a wealth of built-in functionalities. It’s a cost-effective choice for businesses planning to expand. It supports scalability and flexibility without imposing additional transaction fees.
The choice between Shopify and BigCommerce will ultimately depend on individual business needs. Smaller startups may favor Shopify for its simplicity, while larger, more established businesses may lean towards BigCommerce for its comprehensive feature set and advanced customization capabilities.
Businesses often consider migrating to BigCommerce for the enhanced customization options, more robust built-in features, and the absence of additional charges for using third-party payment providers. BigCommerce’s pledge to facilitate unlimited bandwidth and storage further cements its position as a favorable choice for successful eCommerce ventures seeking growth.
Moving your store to a new platform means you need to migrate your data. When doing so, you have a few options. Your choice will depend on your technological prowess, the amount of time you have available, and your budget.
Once you’ve decided how you plan to migrate your data, it’s time to make the move. Here are the steps to take to migrate from Shopify to BigCommerce.
Start by conducting a comprehensive audit of your Shopify store data. Create a detailed inventory of your products, customer data, and order history. Use reliable backup tools or services to safeguard your data, ensuring you have a fallback option in case of data loss during migration.
This preliminary step is crucial in identifying and organizing the data required for migration, ensuring no vital information is omitted. You’ll also be able to figure out if anything is unnecessary before you move it over to your new store.
Next, it’s time to create your new BigCommerce store. Sign up for an account on the platform and get started personalizing your shop. BigCommerce offers users a wide selection of themes, so choose the one that best suits your unique store. Make sure your new storefront allows for easy and intuitive navigation, too.
Personalize your chosen theme to reflect your brand aesthetics, ensuring a seamless transition for returning customers and an engaging interface for new visitors. You can also dive deeper into BigCommerce’s settings to configure elements such as payment gateways, shipping options, and tax configurations. Proper setup of these elements is fundamental in ensuring operational efficiency and providing a seamless shopping experience for your customers. A well set up store paves the way for a smooth data integration process.
Prepare your Shopify product data for migration by exporting all relevant information. This data includes product details such as titles, descriptions, SKUs, prices, and images, along with essential customer data and order history.
You can do this by navigating to the “Products” page from your Shopify admin and then clicking “Export”. You’ll be able to select which products you want to export and customize your CSV file. When you’re done, click “Export products”.
It’s important to note that the CSV will not include the product images themselves, but a link to the original image. That means that when you import the CSV to your new store, the images will appear only if the original image is publicly viewable online. Therefore, you’ll want to leave your Shopify product listings viewable until you complete your migration.
For more information on exporting your Shopify data, you can find Shopify’s guide here.
Now it’s time to begin the data import process to add your products to BigCommerce.
You can directly import your CSV into the BigCommerce platform for free if you feel comfortable doing so. You can find this option by clicking “Products” and then “Import”. You’ll be redirected to a list of import options. Fill these out to suit your needs. Then, upload your CSV in the “Import Products via CSV” section. Click “Next” and then “Start Import”. You’ll be met with a summary of the number of products imported, updated, and failed to be imported.
You can find BigCommerce’s import product tutorial here.
Another option is BigCommerce’s Shopify Data Migration App, which is free for the first 1,000 entries. It’s important to note that this app does not always successfully transfer categories.
Upon completion of the import process, conduct a detailed verification to ensure all data has been accurately transferred. Double check the imported data, ensuring that all product information, customer data, and order histories are intact and correctly represented within your BigCommerce store.
In order to maintain your SEO rankings and ensure the accessibility of your store, set up 301 redirects from your old Shopify URLs to the corresponding BigCommerce URLs. This process is essential in preserving your search engine rankings and preventing broken links, which could negatively impact the customer shopping experience. You must have a paid plan on BigCommerce in order to implement 301 redirects.
You can set up your redirects in your “Settings” tab in BigCommerce. Select “301 Redirect”. Then, you’ll then be able to add redirects by entering the old URL and selecting the new page that you are linking to. Click “Insert Link”, and you’re all set. You can check out this guide to implementing 301 redirects in BigCommerce.
Perform a comprehensive review of all redirects to ensure their correct setup and functionality. Properly configured redirects allow customers to easily find your store and navigate through it without encountering broken links or error pages, fostering a seamless and enjoyable shopping experience.
The last step of the migration process is to thoroughly review your BigCommerce storefront. Double check for accuracy in all product listings, including titles, descriptions, images, and prices. If relevant, transfer and set up your customer accounts and order histories, too. You can do this by exporting the data from Shopify and importing it into your new BigCommerce account. This will ensure an effective transition for your returning customers.
Personalize your BigCommerce store by adding your unique branding elements. Integrate logos, design themes, and other brand-centric visuals to establish a recognizable and cohesive store aesthetic. This visual continuity reinforces brand recognition and enhances the customer shopping experience, fostering loyalty and encouraging repeat business.
It’s a good idea to thoroughly test all functions of your new BigCommerce store to make sure your customers don’t run into any issues when making purchases. Check the operation of payment gateways, checkout processes, and other critical store functionalities to ensure an optimal shopping experience. You can even create a test order to make sure everything is working properly. This will ensure that you don’t miss out on any sales due to your migration.
Once you’ve ensured that everything is working properly, you can choose your new domain name. You can use the default .mybigcommerce.com domain, or if you’d like to use a custom domain name, now’s the time to connect it. You can purchase a domain through BigCommerce or point a domain name you have already purchased to your BigCommerce storefront. You can find out how to do that here.
Before you start selling, make sure to have customer support ready to help any customers who run into problems on your new platform.
Then, launch your store and start selling!
A well planned and executed migration from Shopify to BigCommerce can greatly benefit your eCommerce business by allowing you to leverage the extensive features and capabilities of BigCommerce. The time and effort invested in ensuring a smooth transition will certainly pay off in terms of enhanced scalability, flexibility, and substantial growth potential for your eCommerce store.
And if you need a funding boost for your BigCommerce expansion, check out 8fig. We offer personalized, equity funding plans designed to optimize your cash flow so you can grow your business. Sign up for a Growth Plan today and take your online store to the next level.

Crack the code to funding your eCommerce business with this step-by-step guide, and learn how to secure the capital you need to grow while staying on top of your strategy.

Stuck with extra inventory after Amazon’s Spring Sale? Learn five smart strategies to clear unsold stock, boost cash flow, and avoid future overstocks with smarter inventory planning.
![BFCM: The ultimate guide to eCommerce sales [2025]](https://www.8fig.co/wp-content/uploads/2023/09/cover-2-768x432.jpg.webp)
Get ready for Black Friday and Cyber Monday with our guide on maximizing sales through smart inventory management, effective marketing strategies, and leveraging eCommerce financing.
